
| Version 20 (modified by woodsby, 15 years ago) (diff) |
|---|
ActiveRFID
Description
This plugin is intended to provide affordable RFID support to Vera, using ActiveRFID Hardware. Currently, this plugin has only been tested using one 40m transmitter and one USB RSSI receiver plugged directly into Vera.
Where to Buy
The ActiveRFID hardware, formerly known as cheaperRFID, can be purchased from Cliste Electronics at http://cliste.sailwhatcom.com. I recommend purchasing the USB RSSI receiver, as eventually I intend to provide signal strength based events; and the difference in cost is negligible. I also recommend purchasing transmitters without any sealant, especially if you are purchasing multiple 40m transmitters. It's much easier to identify each transmitter if you pull all the batteries, and put them back in, one transmitter at a time. It's easy enough to seal them yourself using plastic dip or liquid electrical tape.
Setup
First Time Installations
Before getting started setting up the plugin, a little effort is required to get the USB Receiver supported by Vera.
- Plug your RFID receiver into one of Vera's USB ports.
- Log in to your Vera using SSH. If you have never done this, you can refer to the instructions provided in the Luup Somfy Walkthrough here.
- Enter the following at the command prompt:
echo "vendor:067b product:2303" >> /etc/cmh/serproxy.ports
- Now the hardware is set up. Keep your SSH session open.
- Download the latest ActiveRFID plugin from this site. This should include all of the following files:
- D_ActiveRFID.xml
- D_RFIDTransmitter.json
- D_RFIDTransmitter.xml
- I_ActiveRFID.xml
- S_ActiveRFID.xml
- S_RFIDTransmitter.xml
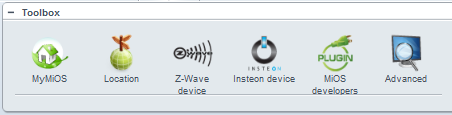
- Log into Vera using any web browser. Navigate to Devices > Luup plugins > Luup files.
- Load all six of the plugin files, check the box labeled "Restart Luup after upload", and click "GO".
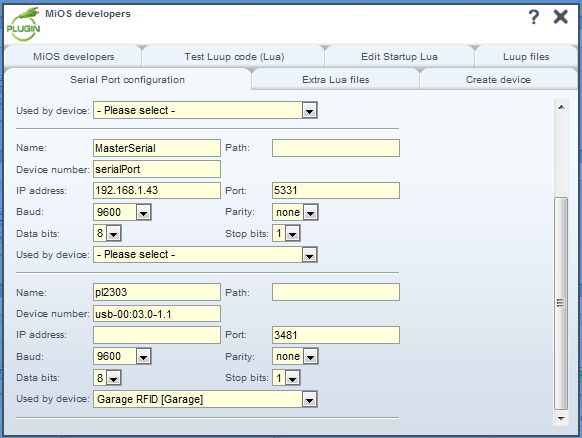
Receiver Setup
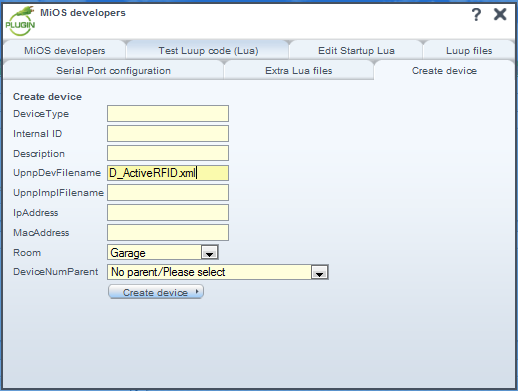
- Navigate to Devices > Luup plugins. Scroll down to "Add device" at the bottom of the page, type "D_ActiveRFID.xml", select the room for your RFID receiver, and click "Add Device".
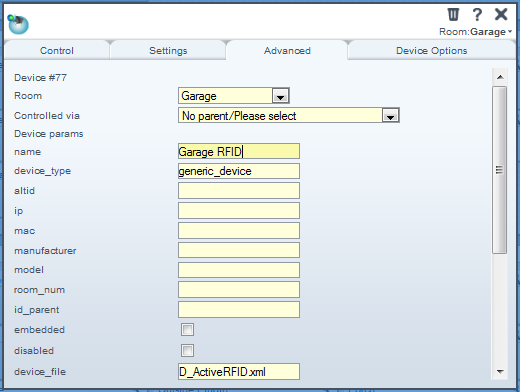
- Scroll up to your new device, type in a name, confirm the room, and click "Save".
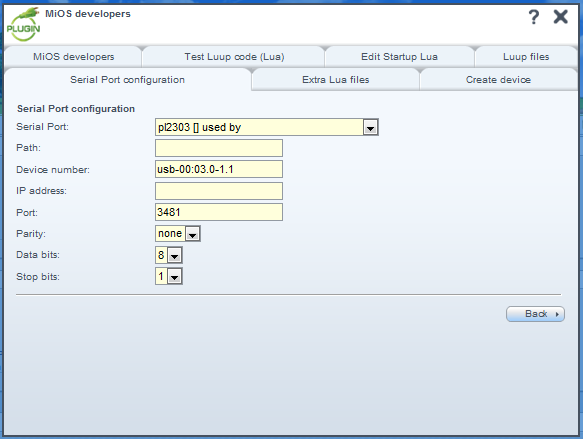
- Navigate to Devices > Luup plugins > Serial Port configuration. Find the new serial device that has been created for your receiver. Under "Used by device", select the device you created in step 8.
- Click Save.
Transmitter Setup
If you are installing more than one transmitter, setup is much easier if you pull the batteries from all your transmitters, and put them back in, one transmitter at a time.
- Navigate back to Devices > Luup plugins, and find the device you created. Expand it by clicking the "+" to the right. For "Transmitters", enter the number of transmitters you wish to add. Then, click "Save". This should create a child device for each transmitter you will add.
- Back at your SSH session, type the following:
tail -f /var/log/cmh/LuaUPnP.log | grep RFID
You should see something like this:
root@HomeControl:~# tail -f /var/log/cmh/LuaUPnP.log | grep RFID
50      07/01/10 15:04:39.601   luup_log:68: RFID tag 1iW9 found by receiver 68, but not assigned to a device. <0x3c10>
50      07/01/10 15:04:41.556   luup_log:68: RFID tag 1iW9 found by receiver 68, but not assigned to a device. <0x3c10>
50      07/01/10 15:04:43.747   luup_log:68: RFID tag 1iW9 found by receiver 68, but not assigned to a device. <0x3c10>
Please note the 4-character tag ID that is returned.
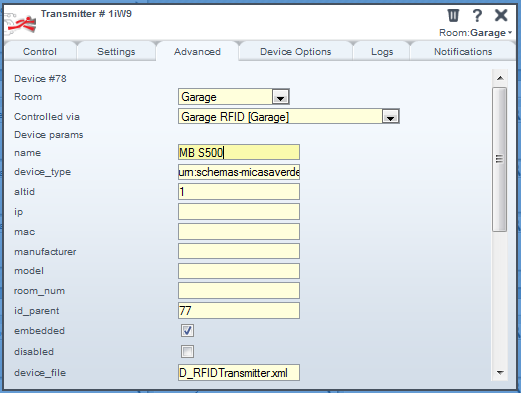
- At your web browser, expand the child device created for your transmitter by clicking the "+" beside it. For "TagID", enter the 4-character ID found in step 13. Click Save.
- Your new child device should now be tripped. Repeat steps 13-14 for each transmitter.
Creating Scenes
Now that you have your RFID Transmitters working, it's time to add some scenes. You may want to lock the doors when you leave, open the garage door when you come home, or set the thermostats to Energy Saving Mode only when you're gone.
- Navigate to Scenes. Scroll down to the room to which you'd like to add your scene, and click "Add scene".
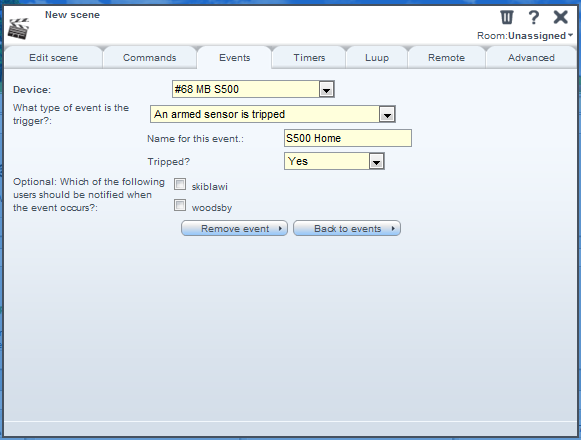
- Name your scene, and click "Add event".
- For "Device", select a transmitter device. For "Event type", select "Home/Away?" or "Armed Home/Away?". Name your event and select "Home" or "Away".
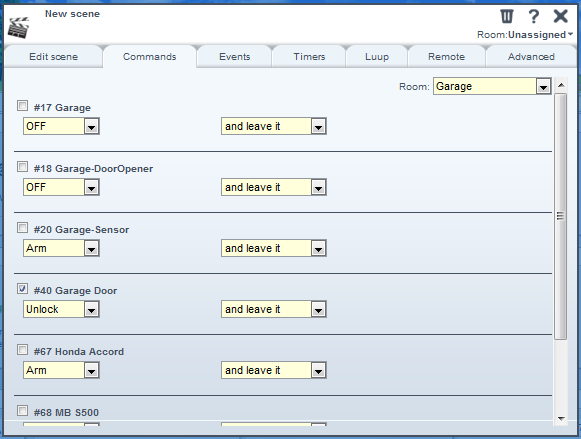
- Expand "Commands" and select the commands you'd like to be associated with the scene. Click "Save".
Adjusting
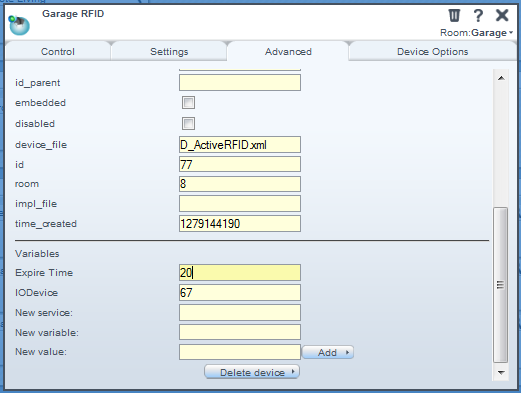
By default, a signal (transmission) received from a transmitter expires in 15 seconds. What this means is that when the transmitter is out of range, the plugin will "untrip" after 15 seconds. This is adjustable by editing the "Expire Time" variable in the RFID receiver device.
- Navigate to Device > Luup plugins, and locate your RFID receiver device. Expand it, and for the "Expire Time" value, enter the number of seconds in which your transmissions will expire.
Please note that the plugin will calculate the number of timers or "buffer" variables based on your Expire Time. What this means is at the default value of 15 seconds, there are a total of 7 timers created, that will represent the first transmission received, and the next six transmissions that will be received during the following 15 seconds. When a timer expires, it will start back up with the next transmission that is received. For this reason, the longer the time, the less likely you will experience false "trips". I'd recommend setting your Expire Time to no less than 10 seconds, but find the balance of reliability and response that works for you.
Attachments
- 1-Toolbox.PNG (17.7 KB) - added by woodsby 15 years ago.
- 2-Upload.PNG (30.8 KB) - added by woodsby 15 years ago.
- 3-CreateReceiver.PNG (23.1 KB) - added by woodsby 15 years ago.
- 4-NameReceiver.PNG (24.9 KB) - added by woodsby 15 years ago.
- 6-SerialPortAssign.PNG (26.3 KB) - added by woodsby 15 years ago.
- 7-Wait.PNG (17.8 KB) - added by woodsby 15 years ago.
- 8-TransmittersFound.PNG (9.9 KB) - added by woodsby 15 years ago.
- 9-NameTransmitter.PNG (26.5 KB) - added by woodsby 15 years ago.
- 10-AdjustExpire.PNG (25.7 KB) - added by woodsby 15 years ago.
- 11-SceneEvents.PNG (28.5 KB) - added by woodsby 15 years ago.
- 12-SceneCommands.PNG (29.7 KB) - added by woodsby 15 years ago.
- ActiveRFID.PNG (20.0 KB) - added by woodsby 15 years ago.
- 5-SerialPortConfig.PNG (32.7 KB) - added by woodsby 15 years ago.