| Version 5 (modified by zoot1612, 10 years ago) (diff) |
|---|
Denon Receiver Control Plugin for Vera
This plugin is a interface to Denon AVR receivers using either Ethernet or serial interface.
Installation
Plugin Prerequisites
- Vera with UI5.
- Serial interface or Ethernet interface to AVR.
- DLNA Media Controller plugin - Common library for UPnP AV.
Supported Devices
Any device that supports the DENON AVR Control Protocol should create the main zone at a minimum. To get other zones added device needs to be added to the table in L_DenonReceiver1.lua . Currently the table is as follows: -
local MODEL = {
    ['300'] = {},
    ['400'] = {zones = "2"},
    ['1000'] = {zones = "2"},
    ['1713'] = {zones = "2"},
    ['1913'] = {zones = "2"},
    ['2000'] = {zones = "2"},
    ['2106'] = {zones = "2"},
    ['2112'] = {zones = "2"},
    ['2307'] = {zones = "1"},
    ['2803'] = {zones = "1"},
    ['2805'] = {zones = "2"},
    ['2807'] = {zones = "2"},
    ['3000'] = {zones = "2"},
    ['3312'] = {zones = "2,3"},
    ['3313'] = {zones = "2,3"},
    ['3803'] = {zones = "1"},
    ['3805'] = {zones = "1,2"},
    ['3806'] = {zones = "2,3"},
    ['3808'] = {zones = "2,3"},{zoneAutoName},
    ['4000'] = {zones = "2,3"},
    ['4306'] = {zones = "2,3"},
    ['4520'] = {zones = "2,3,4"},
    ['4802'] = {zones = "1"},
    ['4806'] = {zones = "2,3"},
    ['5803'] = {zones = "1,2"},
    ['5805'] = {zones = "2,3,4"}
}
How To (installation from the MiOS Marketplace)
- Install the Denon Receiver Control plugin from the MiOS Marketplace.
- Install the DLNA Media Controller plugin from the MiOS Marketplace.
How To (manual installation)
It is the installation method required if you don't have access to the MiOS marketplace.
- Download the plugin files using the Zip Archive link at the bottom of this page: -
http://code.mios.com/trac/mios_denon-receiver-control/browser/branches/UI5Update
- Download the plugin files using the Zip Archive link at the bottom of this page: -
http://code.mios.com/trac/mios_dlna-cntroller/browser/tags/1.2
- Unzip the ZIP archive
- Upload the plugin files:
- In APPS section, open Develop Apps >> Luup Files and upload the following files, check the Restart Luup after upload checkbox and click GO
- L_DenonReceiver1.lua
- createJSON.lua
- D_DenonReceiver1.json
- D_DenonReceiver1.xml
- I_DenonReceiver1.xml
- S_DenonReceiver1.xml
- J_AVRReceiver1.js
- S_DLNAAVTransport1.xml
- S_DLNARenderingControl1.xml
Create a device
If you installed the plugin from the MiOS Marketplace, one device is automatically created. If you have more than one device or you have installed plugin manually you have to add additional devices in the Vera, one for each device you want to control.
- Open APPS section; open Develop Apps >> Create Device.
- In the Upnp Device Filename input box enter D_DenonReceiver1.xml.
- If the device is controlled via Ethernet in the Ip Address box input ip address.
- Click Create device.
- Close the popup window that informs you about the creation of a new device, then push the Reload button.
- When reload is done, refresh your Web browser cache (Ctrl+F5 in most of the browsers)
Issues
Via Ethernet Plugin randomly loses connectivity and the only way to re-establish again is by rebooting the receiver.
Trouble Shooting
- Try powering off receiver then back on again.
- Check that no other clients are connected to port already.
- Check "Network Option: Standby Mode Power Saving" is set to off.
- Serial connection details:-
- Communication system: A half duplex
- Communication speed: 9600bps
- Character length: 8 bits
- Parity control: None
- Start bit: 1 bit
- Stop bit: 1 bit
- Ethernet connection details:-
- Communication system: A half duplex
- speed: 10Mbps/100Mbps
- port: TCP port 23 (telnet)
- Serial connection details:-
- Under the "Advanced" tab set the "Setup" to "0" then restart the luup engine. This will rewrite the json and xml device files.
Attachments
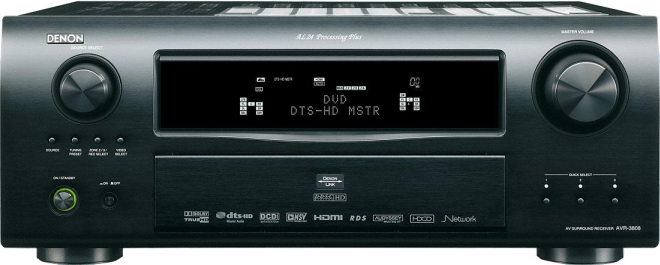
- denon_3808.png (174.4 KB) - added by zoot1612 10 years ago.
- av_receiver_default.png (504 bytes) - added by zoot1612 10 years ago.
- av_receiver_on.png (661 bytes) - added by zoot1612 10 years ago.
- av_receiver_standby.png (508 bytes) - added by zoot1612 10 years ago.

