
Welcome to the EDS One Wire Server Plugin for Vera
Discussion here: http://forum.micasaverde.com/index.php?topic=8381.0
Overview of OW-Server
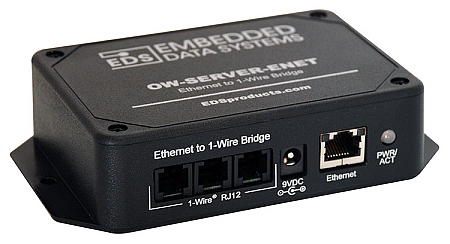
The plugin implements an interface for the Embedded Data Systems OW-Server (see http://www.embeddeddatasystems.com/OW-SERVER--1-Wire-to-Ethernet-Server_p_152.htm). This is a low cost Ethernet to One-Wire system interface that can be used to interface to a number of environmental sensors. The OW-Server supports a line of advanced environmental sensors from EDS such as temperature, humidity, pressure, light, but also low cost Dallas sensors such as the DS18B20 temperature sensor. The OW-Server supports up to 24 physical devices, although many devices support multiple sensors - in this case, the plugin will provide an individual child device for each sensor.

Installation
Upload the files using the "MiOS Developers" button. Click on Luup Files and upload the 5 files for the plugin.
Create a new device with the following parameters -:
- DeviceType: urn:cd-jackson-com:device:OWServer:1
- Description: One Wire Server
- UpnpDevName: D_OWServer.xml
- UpnpImplFilename: I_OWServer.xml
- IP: Set the IP address of the server
Click "Create Device". Restart Luup.
The plugin needs the json library. To install this, go to -:
and download this to the following directory on Vera
- /usr/lib/lua
Usage
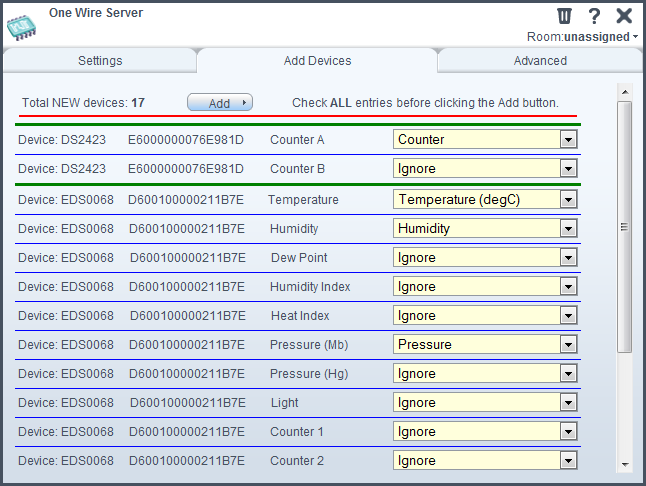
Once the plugin is installed, it will show the number of devices detected on the one-wire bus. You can then click on the properties box, and you will be presented with a tab called "Add Devices". If there are any devices that have not been added as Vera devices, they will be listed here. It's worth understanding how this (currently!) works. In the case of the EDS-ENV range of environmental sensors, many sensors are available on a single device (e.g. temperature, pressure, humidity, dewpoint, and a control relay). You will be presented with a list of the possible devices, and you can select how you want these mapped into Vera devices. It's also possible to select "Ignore", in which case no device will be created. It's important to understand that (currently) once any sensors have been added to Vera from a physical on-wire device, they will not be listed in this window again. So - make sure you add all the variables you want at the beginning!

Once you've selected all the sensors you want added, click the "Add" button and the sensors will be created. It will take some time before the data is actually updated within the Vera device, this is because the plugin performs some averaging to limit the amount of noise on the data. Sensors are typically provided with a single decimal place output (e.g. 15.2 degC, or 45.1% humidity), so this is done to avoid unnecessary data fluctuations.
Tuning Operation
There are a few user parameters that can be changed to modifiy the way the plugin works.
In the OW-SERVER plugin ADVANCED tab, you can edit the SamplingPeriod variable. This sets the number of seconds between each subsequent update of the server data. Under some circumstances, the plugin will actually request an update quite quickly (every few seconds) - this will occur for a period after the plugin starts, and also for a period after a command is sent to a device.
In each device, there is the Average variable. This sets the number of readings used in a sliding window averaging filter. Some sensors, such as humidity, vary quite a lot, so a reasonbly large filter value is advisable. Others, such as the DS18B20 temperature sensor, are quite stable and a low value can be used. For digital values such as status points, set this to 1. When a device is created, it will be set to sensible defaults, so you shouldn't need to modify this.
Energy Monitoring
Some of the sensor options have "+ Energy". If you select this type, then the plugin will also set the Vera energy variables so that the energy monitoring system is updated when the sensor changes. The OW-Sensor plugin uses a variable DeviceWatts in the ADVANCED tab to set this - set it to the number of watts that is being consumed when the sensor is active.
A Note About Sensors
Device supported
- Dallas DS18B20 temperature sensor
- Dallas DS2406 multidrop controller
- EDS OW-ENV-TH/OW-ENV-THR Temperature / Humidity sensor
- EDS OW-ENV-THPL/OW-ENV-THPLR Temperature / Humidity / Pressure / Light sensor
- EDS OW-ENV-TL/OW-ENV-TLR Temperature / Light sensor
- EDS D2Photo light presence/absence monitor
EDS OW-ENV Sensors: LED and Relay Use
Both the LED and Relays inside the EDS OW-ENV sensors can be configured to provide a binary switch interface within Vera. For this to work correctly, you need to use the OW-Server web interface to set the LEDFunction or RelayFunction variables to value 2. This allows them to be controlled externally.
EDS D2Photo: Light Sensor
The D2Photo, light presence/absence monitor, provides the ability to monitor the state of fluorescent or incandescent lighting. It uses the DS2406 multidrop controller - this is quite a common chip and is used in a number of one-wire interface units. The OW-Sensor Plugin doesn't know if you have a D2Photo connected, or something else with the DS2406 controller - it therefore lists a number of options for the DS2406. It is recommended that you only use InputLevel_A (set InputLevel_B to Ignore), and select either Light Sensor, or Light Sensor + Energy. The only difference is that with the "+Energy" option, the plugin will set the energy monitoring variable so that you can use it to monitor power. In this way, if you are using the D2Photo to monitor a light status, you can also have the Vera energy monitoring system update when light is indicated.
Attachments
- OWServer1.png (35.3 KB) - added by chris 14 years ago.
- ow-server-enet.jpg (68.4 KB) - added by chris 14 years ago.
- OW-Server.zip (12.4 KB) - added by chris 13 years ago.