
Last modified 14 years ago
Last modified on 2011-04-11 06:16:52
Installation

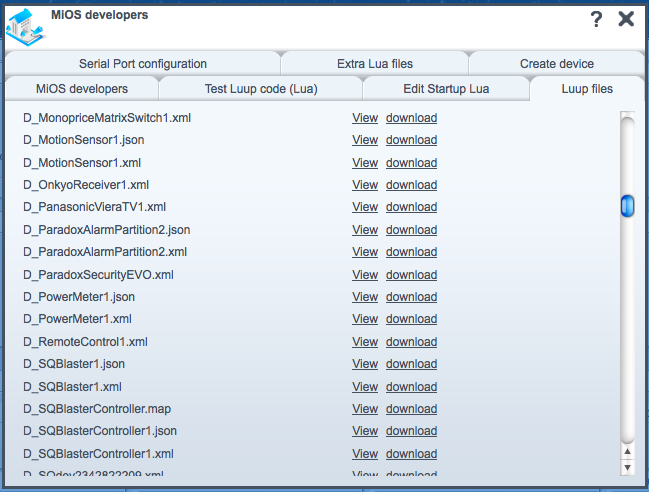
Install the SQController Plugin Code
- Download the following files from Source Control, and expand it to give the files listed below
- ZIP Bundle
- I_SQBlaster1.xml
- D_SQBlaster1.xml
- D_SQBlaster1.json
- I_SQBlasterController1.xml
- D_SQBlasterController1.xml
- D_SQBlasterController1.json
- D_SQBlasterController.map
- ZIP Bundle
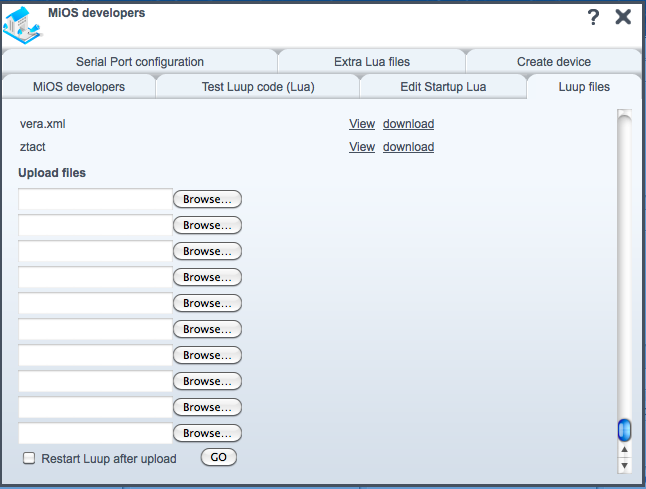
- Goto MiOS developers --> Luup files
- Click the (Browse) buttons on the bottom, and enter the 7 filenames references above.
- Select the checkbox "[x] Restart Luup after upload" and click (Go)
- ... wait whilst it uploads and restarts the Lua engine ...
- If successful, you'll see the 7 filenames listed in the System (using the exact names listed above).

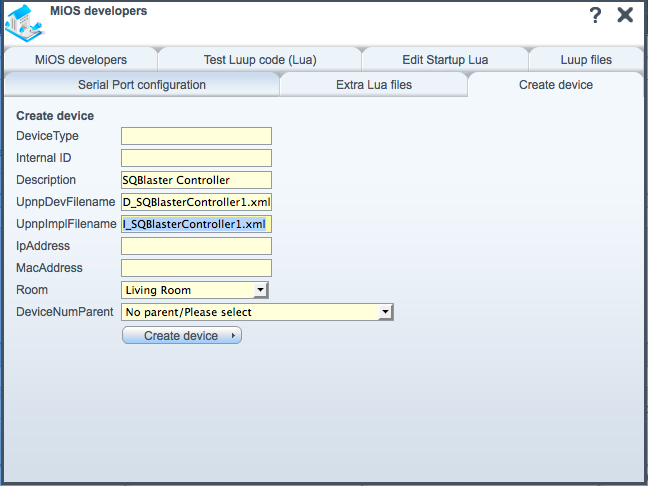
Create the SQController Device
- Navigate to the MiOS developers --> Create device tab
- For the UpnpDevFilename field, type "D_SQBlasterController1.xml".
- For the UpnpImplFilename field, type "I_SQBlasterController1.xml".
- For the Description field, type "SQBlaster Controller".
- Click (Create device) button
- Close this Dialog and click (Save)

Extract Configuration Files from SQRemote
- Backup your SQRemote configuration to Box.net
- Download the Backup file from Box.net, and open it.
- Extract each file called "devnnnnnnnn.xml"
- Extract the file called "PackageDevices.xml"
Install Configuration Files into Vera
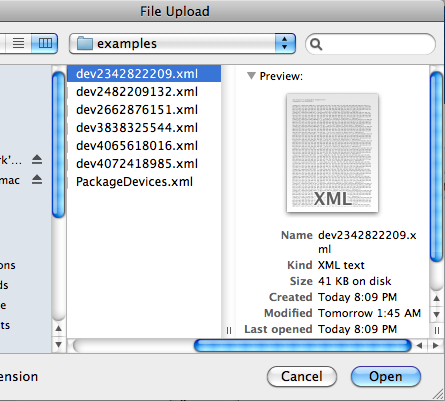
- Goto MiOS developers --> Luup files
- Click the (Browse) buttons on the bottom, and enter the filenames extracted above.
- Select the checkbox "[x] Restart Luup after upload" and click (Go)
- ... wait whilst it uploads and restarts the Lua engine ...
- If successful, you'll see the filenames listed in the System (using the exact names extracted above).

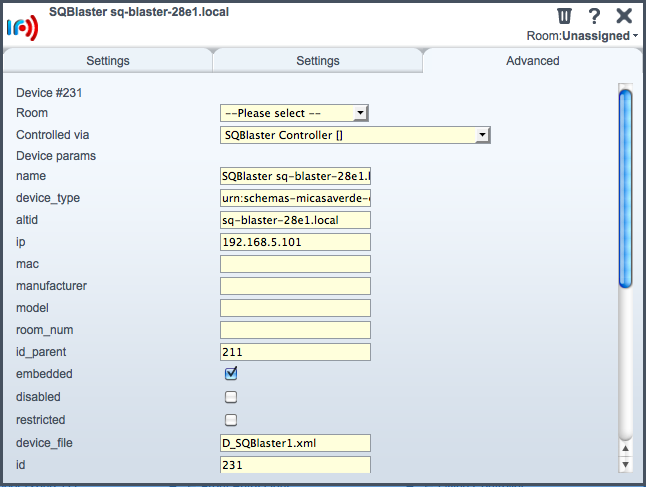
Configure the SQBlaster IP Addresses
The setup above creates SQBlaster devices, one for each registered with SQRemote. These need to be configured with IP Addresses before they can function.
- Open the Wrench (or Spanner!) on your new "SQBlaster sq-blaster-xxxx.local" device.
- Select the [Advanced] Tab
- Enter a value for the ip field to match the address of your Network attached SQBlaster Device. In the example, I'm connecting to 192.168.5.101. This will be different for your installation.
- Dismiss this Dialog and Press (Save)
Test the Configuration
When all complete, it should look something like:

TODO:...
Attachments
- SQBlasterControllerDeviceCreation.png (55.9 KB) - added by guessed 14 years ago.
- SQBlasterControllerDevices.png (64.7 KB) - added by guessed 14 years ago.
- SQBlasterControllerFiles.png (94.2 KB) - added by guessed 14 years ago.
- SQBlasterControllerFileUpload.png (61.5 KB) - added by guessed 14 years ago.
- SQBlasterControllerIPAddressConfig.png (62.0 KB) - added by guessed 14 years ago.
- SQRemoteFiles.png (74.0 KB) - added by guessed 14 years ago.