
Wake-on-LAN Plugin
This plugin can be used to wake a machine up. The remote machine must support the Wake-on-LAN feature. Up to 10 MAC addresses can be stored. The MAC addresses can be written with both upper case and lower case letters, and can have either the colon(:) separator (Unix style) or the dash(-) separator (Windows style), but not both.
Table of Contents
Example Uses
- Have your "I'm home" scene include turning on your computer.
- When on vacation you can leave your computer off and wake it up should you need to connect to it remotely.
Limitations
Name cannot contain the hash(#) character.
Setup Instructions (UI4)
- Download all these files:
- On the Vera dashboard go to MiOS developers -> Luup files.
- Upload all the files, then click GO. Do not check Restart Luup after upload. If it's checked, uncheck it.
- After the files were uploaded go to Create device and:
- in the UpnpDevFilename box write D_WOL.xml,
- in the Description box write Wake-on-LAN.
- Restart Luup.
- Reload page. (Otherwise the interface won't be updated.)
The tabs
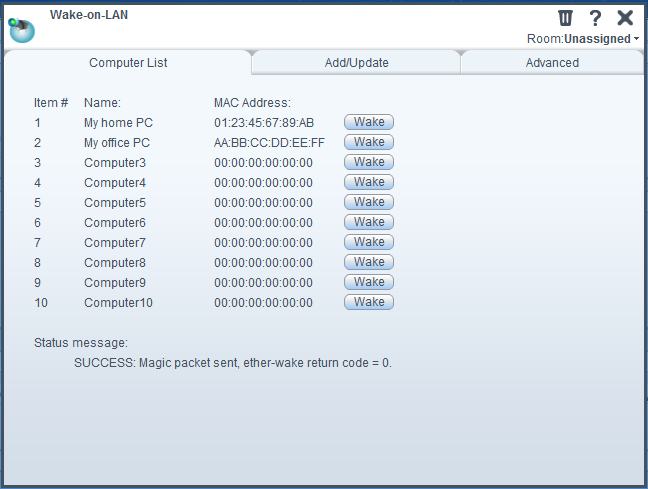
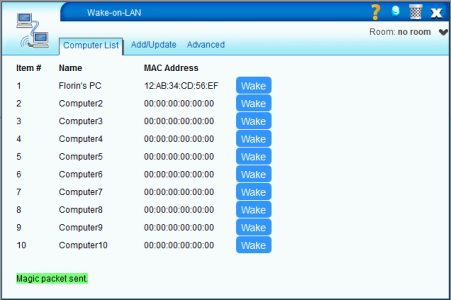
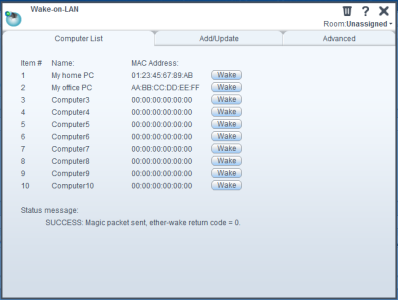
Computer List
Up to 10 computers can be stored. The status message at the bottom is the status of the last operation. On UI5 it also tells you if you have the wol package installed.


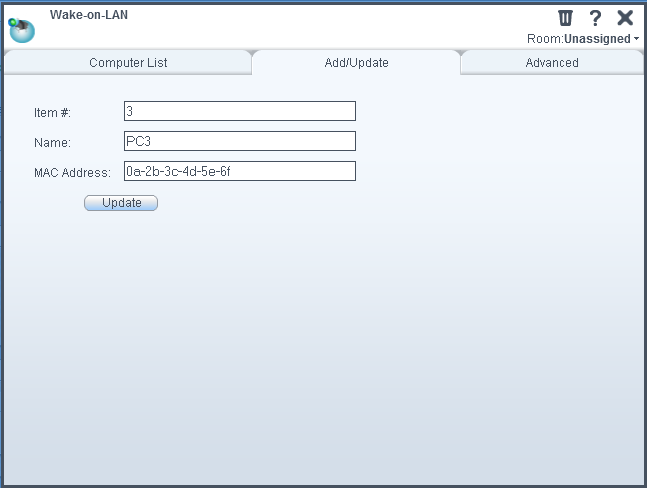
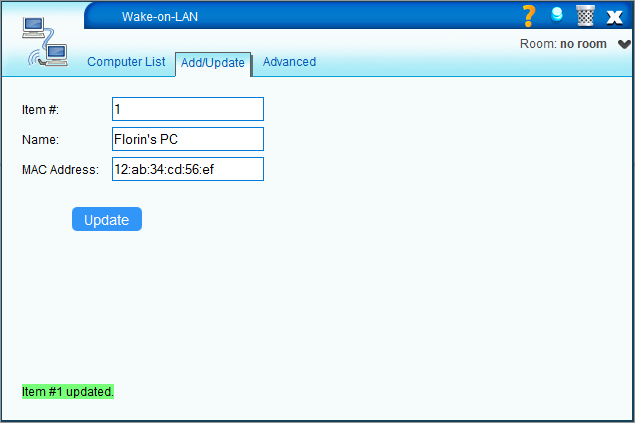
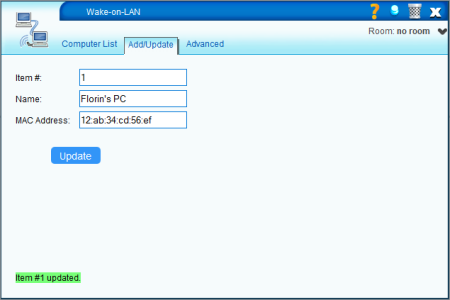
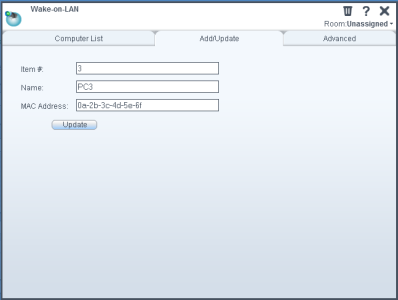
Add/Update
The MAC addresses can be written with both upper case and lower case letters, and can have either the colon(:) separator (Unix style) or the dash(-) separator (Windows style). When updating an item from the list, leaving a field empty will preserve its old value. So if you want to upgrade only the MAC address, leave the Name field empty. If the Item field is empty, it defaults to 1.


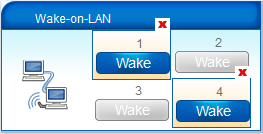
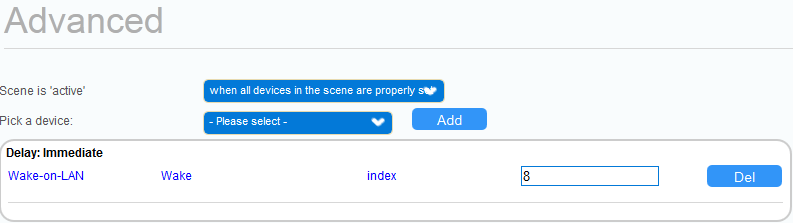
Using it in a scene (UI5)
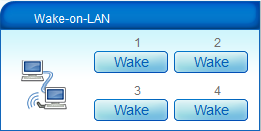
The first 4 items can be accessed directly from the dashboard to make it easy to create scenes. If you want to wake an item greater than #4, you must go to the Advanced tab, pick the Wake-on-LAN device, select the Wake action and enter the item # in the index field.


Manually installing wol
The plugin installs wol automatically at the first run. However, it may happen that the installation will fail. In this case you must manually install wol.
- SSH into Vera using the instructions here: http://wiki.micasaverde.com/index.php/Logon_Vera_SSH
- For Vera 2 run this command:
opkg install http://code.mios.com/trac/mios_wake-on-lan/raw-attachment/wiki/WikiStart/wol_0.7.1-2_brcm-2.4.ipk
For Vera 3 run this command:
opkg install http://code.mios.com/trac/mios_wake-on-lan/raw-attachment/wiki/WikiStart/wol_0.7.1-3_ramips.ipk

- That's all.
Attachments
- add_update.png (16.6 KB) - added by mcvflorin 14 years ago.
- computer_list.png (35.8 KB) - added by mcvflorin 14 years ago.
- dashboard.PNG (14.3 KB) - added by mcvflorin 13 years ago.
- tab_add_update.PNG (29.5 KB) - added by mcvflorin 13 years ago.
- tab_computer_list.PNG (39.4 KB) - added by mcvflorin 13 years ago.
- tab_add_update_h300.png (19.4 KB) - added by mcvflorin 13 years ago.
- tab_computer_list_h300.png (46.8 KB) - added by mcvflorin 13 years ago.
- ui4_add_update_h300.png (11.8 KB) - added by mcvflorin 13 years ago.
- ui4_computer_list_h300.png (38.5 KB) - added by mcvflorin 13 years ago.
- scene_basic.png (18.8 KB) - added by mcvflorin 13 years ago.
- scene_advanced.png (14.5 KB) - added by mcvflorin 13 years ago.
-
wol_0.7.1-2_brcm-2.4.ipk
(7.7 KB) -
added by mcvflorin 13 years ago.
'wol' package for Vera 2 platform
-
wol_0.7.1-3_ramips.ipk
(7.2 KB) -
added by mcvflorin 13 years ago.
'wol' package for Vera 3 / Vera Lite platform
- install_wol.png (8.7 KB) - added by mcvflorin 13 years ago.