
| Version 17 (modified by guessed, 13 years ago) (diff) |
|---|

The Sonos Wireless HiFi Music Systems plugin for Vera
This plugin permits control of your Sonos via Vera scenes.
Development Status
Tested features:
- Supported Models: ZP80, ZP100, Sonos3, Sonos5, Sonos Connect, Sonos Connect AMP tested
- Functionality:
- Sonos:
- Mute
- UnMute
- SetVolume
- SetFileToPlay (Places chosen audio file into queue)
- MediaNavigation:
- ChapterDown(Not implemented)
- ChapterUp (Not implemented)
- DiskDown (Not implemented)
- DiskUp (Not implemented)
- FastForward (Not implemented yet)
- Pause
- Play
- QuickSkip (Not implemented)
- Rewind
- SkipDown(implemented as 'Next' on Sonos)
- SkipUp (implemented as 'Previous' on Sonos)
- Slow (Not implemented)
- Stop
- Volume:
- Down (by 3 out of 100)
- Mute (a toggle mute function - currently a poor mans version)
- Up (by 3 out of 100)
- Sonos:
To do list:
- Autodiscovery of Zones
- Autonaming of zone names
Installation
What you need
- Vera with UI4, and UI5 has been tested.
- A Sonos Zone
- The plugin files: use the Zip Archive link at the bottom of this page: http://code.mios.com/trac/mios_sonos-wireless-music-systems/browser/trunk#
How To
- Upload the plugin files:
- In the Toolbox section open MiOS Developers >> Luup Files and upload all the files you downloaded (except the file D_Sonos1_UI4.json and the services subdirectory). check the Restart Luup after upload checkbox and click GO.
- Create the Sonos device:
- Open Create Device.
- In the UpnpDevFilename input box enter D_Sonos1.xml.
- In the Description input box enter a name for the panel device, e.g. Sonos Living Room.
- Click Create device.
- Close this window and Save.
Configuration
- In the Sonos device advanced control tab specify the IP Address of your Sonos Zone
- Now actions are available in scenes
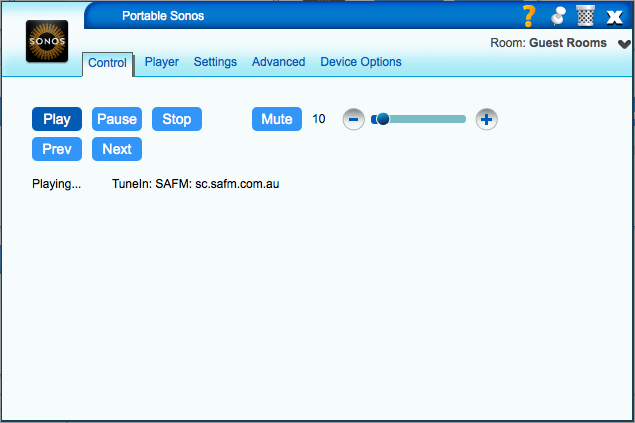
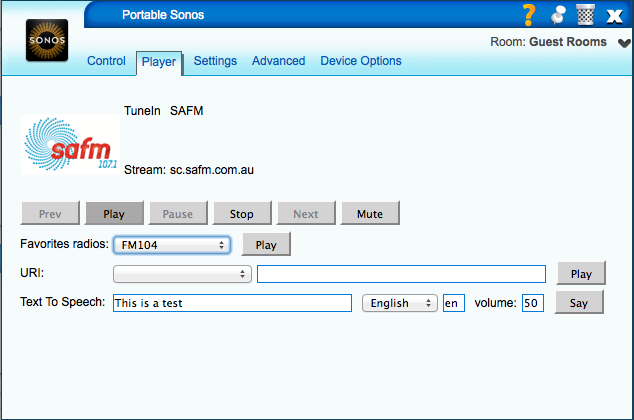
User Interface


Scenes
Creating a Sonos scene under UI5
 To use the Sonos device under UI5, follow the steps outlined below.
- Create New Scene
- Give the scene a name, such as Play Sonos
- Select the [Advanced] option/tab
- Select the Sonos device
- Click (Add)
- Then from the drop down options list created below, Choose SetFileToPlay and enter the full location of the NAS file
e.g. 192.168.1.10/media/Music/Mp3s/Changes.mp3
Now you have selected the file, you need to tell the Sonos to play it
- Select the Sonos device again
- Click (Add)
- Then from the drop down option list created below, Choose 'Play'
- Confirm Changes & (Save)
Now you should have a scene that, once run, will play the track you've selected.
Notes:
- The above bypasses the Sonos queue and will just play the selected track only.
- If you know the length of the track being played you can set a delay to occur
e.g 3.45mins and set another file to play.
Reference
- Main discussion area - http://forum.micasaverde.com/index.php/board,47.0.html
- Example UI5 scene post from @parkerc
Attachments
- D_Sonos1.xml (599 bytes) - added by anker 14 years ago.
- I_Sonos1.xml (5.6 KB) - added by anker 14 years ago.
- S_Sonos1.xml (701 bytes) - added by anker 14 years ago.
- SonosUI5AdvancedScene.jpg (80.8 KB) - added by guessed 13 years ago.
- Sonos-Dashboard.png (23.9 KB) - added by guessed 13 years ago.
- Sonos-Dialog-Control.png (43.0 KB) - added by guessed 13 years ago.
- Sonos-Dialog-Player.png (58.8 KB) - added by guessed 13 years ago.