
| Version 76 (modified by hek, 12 years ago) (diff) |
|---|

Arduino Sensor Plugin
The Arduino sensor plugin allows you to build your own cheap wireless sensors [for less than $10]. The sensors is using Nordic Semiconductors transceiver nRF24L01 for wireless data transmissions. The Arduino Vera plugin automatically creates the sensor devices it finds on the radio network. Creating your own sensors should be pretty simple using the supplied Arduino library and example sensor sketches.
Arduino is an open source hardware prototype board that have lots of both digital and analog IO pins. There are an enormous amount of different cheap sensors that is compatible with the Arduino hardware.
Link Arduino page: http://arduino.cc
Relevant forum thread: http://forum.micasaverde.com/index.php/topic,16170.msg123378.html
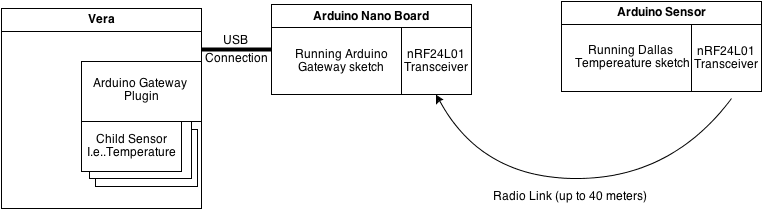
Architecture

Author
Henrik Ekblad - henrik.ekblad at gmail.com (hek on forum)
Installing the Vera plugin
The latest version of the Vera plugin can be found here:
http://code.mios.com/trac/mios_arduino-sensor/browser/trunk/Vera

- Download all files and upload them in Vera under APPS->Develop Apps->Luup files.
- To create the new device to to APPS->Develop Apps->Luup and enter "D_Arduino1.xml" in "Upnp Device Filename" and press "Create Device"
- After the usual reload/refresh ritual the Arduino root device should pop up.
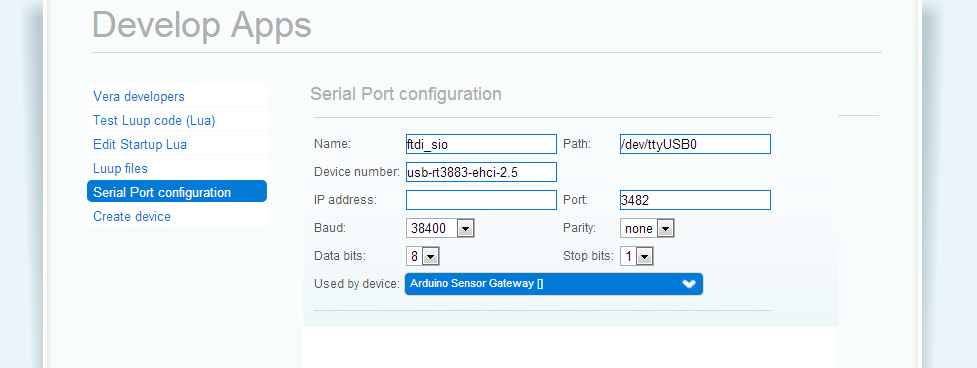
- If you have your Arduino board plugged into Vera you should now configure which serial device to use. See image to the right.
Using the Arduino library
All the components developed and compiled here are Open Source. The Vera plugin was inspired by the excellent rfxtrx plugin. I've also written a Arduino library handling all encoding and communication between Arduino sensors and ArduinoGateway. The Vera plugin part automatically creates newly found sensors in Vera.
It should be pretty simple to use the library (some more documentation in vera.h). But here follows the basic usage in your Arduino sketch:
#include <SPI.h>
#include <RF24.h>
#include <Vera.h>
#include <EEPROM.h>


// Set RADIO_ID to something unique in your sensor network (1-254)
// or set to AUTO if you want vera to assign a RADIO_ID for you.
#define RADIO_ID AUTO

// Create RF24 library instance using pin 9,10 which is what I've described how to hook up the radio module in this wiki.
RF24 radio(9,10);

// Create a Vera library instance
Vera sensors(RADIO_ID, &radio);

void setup()
{
  // Initialize and start up vera library (this also initializes the radio stuff)
  vera.begin();

  // Register sensor(s) to Vera (they will be created as child devices when found). The arguments as follows.
  // childId      Each Arduino can have up to 128 child sensors. 0-127.
  //              Here we register childId 0.
  // deviceType   Which (vera) device type to use for this sensor. See Vera.h for all options available.
  //              In this example we use a motion sensor
  vera.sendSensorPresentation(0, S_MOTION);
}

void loop()
{
   // Send a variable change to vera. In this case for childId 0 set the Tripped value to "1".
   vera.sendVariable(0, V_TRIPPED, "1");
   delay(10000); // Delay 10 seconds
}
Arduino Sketches
 A sketch is a small program that you download to the Arduino boards. To get started download Arduino SDK here: http://arduino.cc/en/Main/Software
Also make sure to install all Arduino libraries I've created and collected here before trying to build the sensor sketches below. http://code.mios.com/trac/mios_arduino-sensor/browser/trunk/Arduino/libraries
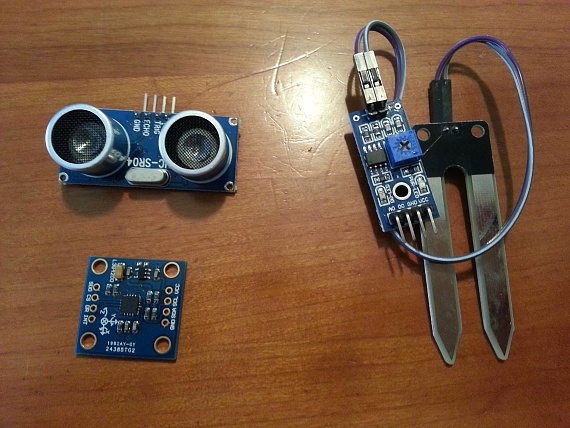
Follow the description below on how to assemble hardware and configure each type of sensor. I've also tried to link all the hardware necessary to build each sensor [from aliexpress.com].
 Acts as a link between Vera and your wireless sensors.
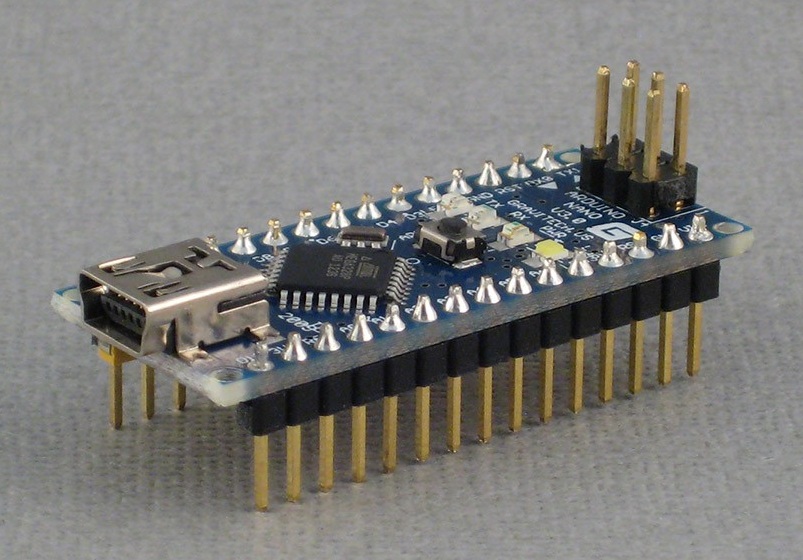
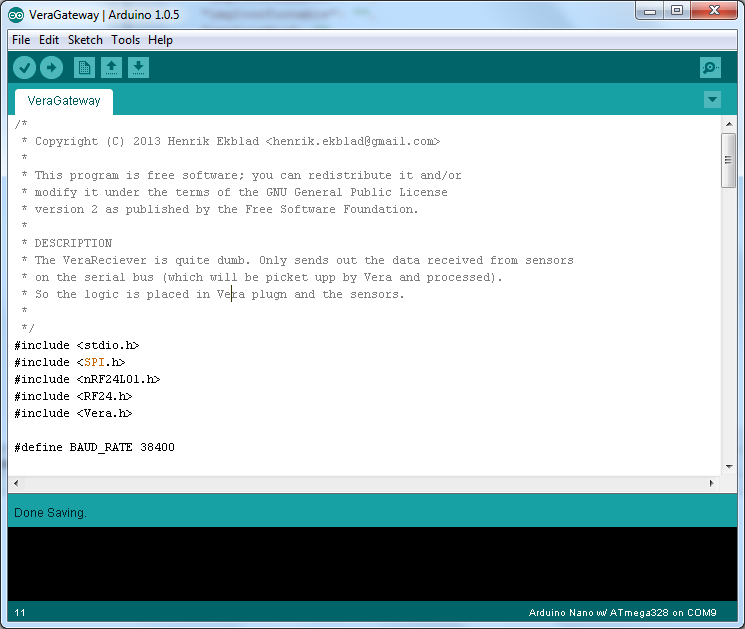
This sketch should be downloaded to an Arduino Nano which then is connected to your Vera using a usb cable.
It is important to use a Nano board for the ArduinoGateway as it contains a serial usb chipset recognized directly by Vera.
Acts as a link between Vera and your wireless sensors.
This sketch should be downloaded to an Arduino Nano which then is connected to your Vera using a usb cable.
It is important to use a Nano board for the ArduinoGateway as it contains a serial usb chipset recognized directly by Vera.
This is an example sensor sketch that sends in Dallas temperature information and presents it as a temperature devices in Vera.
Bed occupancy sensor? Or use it in the garage to show when the car has reached the right location. Why not measure your own length every day using your Vera?
Sketch that sends DHT11/22 data to Vera which displays them as a humidity and temperature device.
Sensor sketch that reports light level and displays it in Vera using a light sensor device.
Motion sensor sketch that triggers a motion sensor security device in Vera.
Pressure/Temperature/Weather forecast sensor (BMP085)
Example sketch showing how to use a BMP085 pressure sensor to create a simple weather station with forecast calculation. Everything is sent and displayed as a barometer and temperature device in Vera.
Soil moisture sensor that triggers a security sensor device in Vera.
Relay sketch that can be controlled from Vera using a regular binary light switch device in Vera.
Power Consumption
My initial power measurements on a Arduino Mini Pro with radio module and motion detector shows a power consumption of 0.48 mAh in sleep mode. When motion is detected consumption raises to 1,5 mAh for a couple of seconds when radio powers up and transmits data to vera.
Converted to real life figures, this would make three 2000mAh alkaline AA batteries connected in series (giving 4.5V) last for almost 6 months (2000/0.48 hours) directly connected to VCV (not raw as it passes a regulator). Note that this is just a theoretical calculation. I have not made any long time measurements or tests myself yet. Read more about the subject on the following links:
http://hwstartup.wordpress.com/2013/03/11/how-to-run-an-arduino-on-a-9v-battery-for-weeks-or-months/ http://hwstartup.wordpress.com/2013/04/15/how-to-run-an-arduino-clone-on-aa-batteries-for-over-a-year-part-2/ http://www.thalin.se/2013/04/arduino-pro-mini-low-power-modification.html
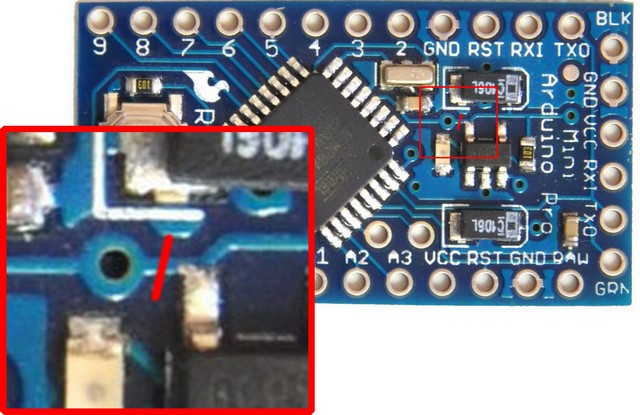
 When feeding the Arduino Pro Mini with 5V through VCC (unregulated). It is possible to reduce the consumption a few additional uA by cutting of the power regulator which also disables the power led. Note that you cannot feed the arduino through the raw pin after this operation. Note: This tip does not apply to newer pro minis (or funduino in my case) with a different layout.
Buying guide
There are many Arduino models out there. Here is a good overview of the different models: https://www.sparkfun.com/arduino_guide
A good start kit for building sensors for your Vera could consist of:
MORE TO COME
Changelog
CHANGES 1.2
- Added possibility to request time from vera
- Support for 5 custom variables (can be stored in any sensor device). Note that chixxis variable container is still not supported. But the functionality is similar.
- Sensors reports their library version to Vera.
- New example sketch for time and variable functionality
- SendCommand? action added in vera plugin which makes it possible to send data to sensors from scenes (advanced-section) or via luup-calls.
- Auto-id added. A sensor can now request id from vera at first start. The id gets stored in the sensors EEPROM. All example sketches now uses auto-id functionality. You can still use static ids if that is preferred.
- Fixed "No Implementation" message when pressing Armed/Bypassed? on security sensors.
- Cleaned up plugin code
CHANGES 1.0
- Initial release

Attachments
-
nano.jpg
(136.2 KB) -
added by hek 12 years ago.
Arduino Nano
- sdk.png (53.6 KB) - added by hek 12 years ago.
- serial.png (32.2 KB) - added by hek 12 years ago.
- gw.jpg (268.9 KB) - added by hek 12 years ago.
- arch.png (18.4 KB) - added by hek 12 years ago.
- sensors.jpg (113.1 KB) - added by hek 12 years ago.
- Arduino48.png (5.0 KB) - added by hek 12 years ago.
- ProMini-cut.jpg (77.8 KB) - added by hek 12 years ago.
- ArduinoNode48.png (5.7 KB) - added by hek 12 years ago.
- RelayNode48.png (3.6 KB) - added by hek 12 years ago.
- ArduinoVeraArch.png (22.8 KB) - added by hek 12 years ago.
- Node_0.png (5.4 KB) - added by hek 11 years ago.
- Node_100.png (5.7 KB) - added by hek 11 years ago.
- Node.png (5.7 KB) - added by hek 11 years ago.
- Relay_0.png (5.9 KB) - added by hek 11 years ago.
- Relay_100.png (5.2 KB) - added by hek 11 years ago.
- Relay.png (5.2 KB) - added by hek 11 years ago.