

NOTE! This page is no longer updated
You will find the latest information about MySensors here:
Arduino Sensor Plugin
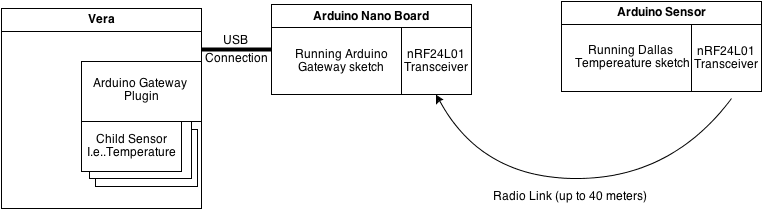
The Arduino sensor plugin allows you to build your own cheap wireless sensors [for less than $10]. The sensors is using Nordic Semiconductors transceiver nRF24L01 for wireless data transmissions. The Arduino Vera plugin automatically creates the sensor devices it finds on the radio network. Creating your own sensors should be pretty simple using the supplied Arduino library and example sensor sketches.
Arduino is an open source hardware prototype board that have lots of both digital and analog IO pins. There are an enormous amount of different cheap sensors that is compatible with the Arduino hardware.
Link Arduino page: http://arduino.cc
Relevant forum thread: http://forum.micasaverde.com/index.php/topic,16170.msg123378.html
All the components developed and compiled here are Open Source. The Vera plugin was inspired by the excellent rfxtrx plugin. I've also written a Arduino library handling all encoding and communication between Arduino sensors and ArduinoGateway. The Vera plugin part automatically creates newly found sensors in Vera when set to include mode. New sensors nodes will automatically find the relay node closest to gateway or the gateway itself. All nodes will also be assigned a unique id from vera. So you basically don't need to do any manual configuration of new sensors. Just throw them in!
Architecture

The sensor network can consist of up to 255 radio nodes. Each radio node can have up to 255 child sensors.
Author
Henrik Ekblad - henrik.ekblad at gmail.com (hek on forum)
Arduino Sketches and Vera Plugin
 A sketch is a small program that you download to the Arduino boards. To get started download Arduino SDK here: http://arduino.cc/en/Main/Software
Also make sure to install all Arduino libraries I've created and collected here before trying to build the sensor sketches below.
https://github.com/mysensors/Arduino/tree/master/libraries
Follow the description below on how to assemble hardware and configure each type of sensor. I've also tried to link all the hardware necessary to build each sensor type.
You can connect more than one sensor to each Arduino. Each Pro Mini Arduino has 13 digital in/out pins and 5 analog dito. The radio uses 5 pins so there are plenty left for connecting sensors. Some of them (humidity and pressure) actually use one pin but give also give temperature information (for free) without using any extra pins. When connecting several sensors to one Arduino you'll also have to combine the example sketches below. Also keep in mind that it could be challenging to use interrupts (to be able to sleep most of the time) when several sensors fight for attention and some of them wants to report at a interval.
Arduino Gateway
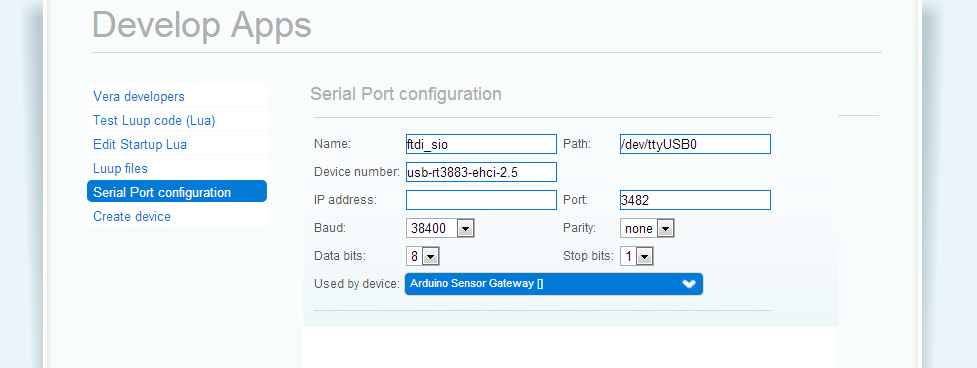
Setting up Arduino Gateway and Vera Plugin
 Acts as a link between Vera and your wireless sensors.
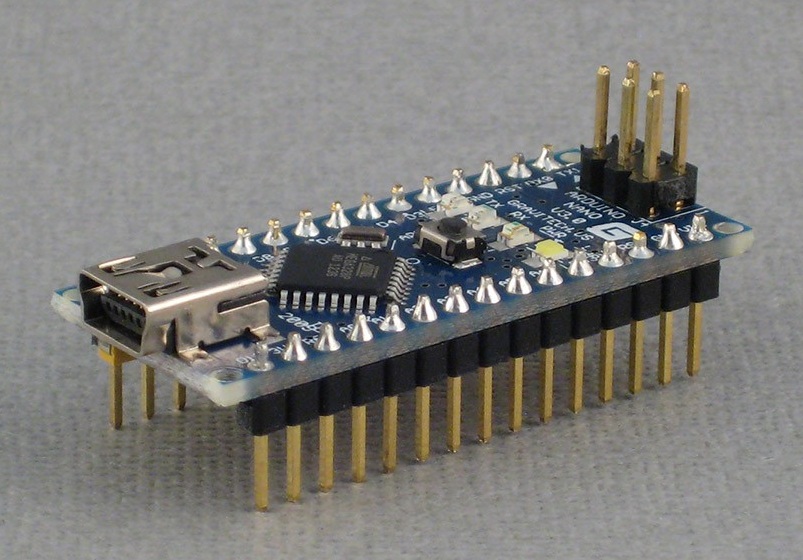
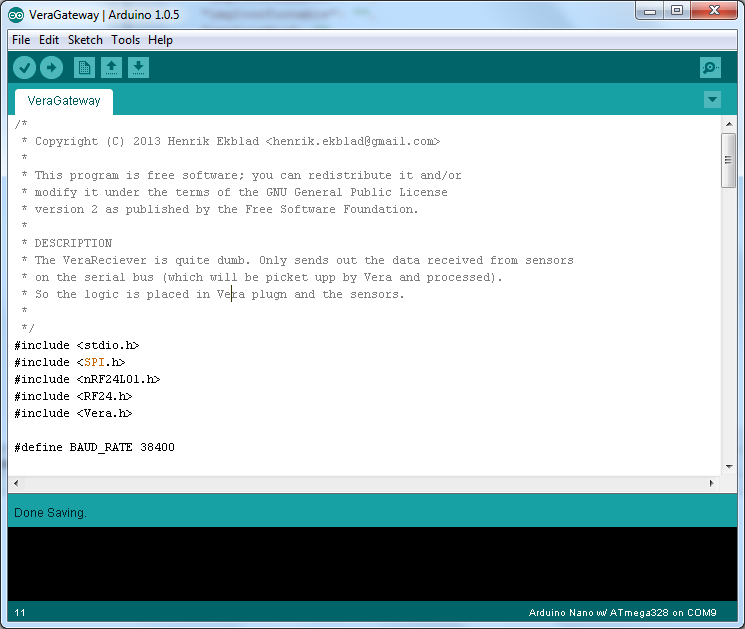
This is a mandatory sketch that must be downloaded to an Arduino Nano. This nano is then connected to your Vera using a usb cable.
It is important to use a Arduino Nano board for the ArduinoGateway because it contains a serial usb chipset recognized by Vera.
You will also get instructions on how to install the Vera plugin here.
Acts as a link between Vera and your wireless sensors.
This is a mandatory sketch that must be downloaded to an Arduino Nano. This nano is then connected to your Vera using a usb cable.
It is important to use a Arduino Nano board for the ArduinoGateway because it contains a serial usb chipset recognized by Vera.
You will also get instructions on how to install the Vera plugin here.
Sensors
This is an example sensor sketch that sends in Dallas temperature information and presents it as a temperature devices in Vera.
Bed occupancy sensor? Or use it in the garage to show when the car has reached the right location. Why not measure your own length every day using your Vera?
Sketch that sends DHT11/22 data to Vera which displays them as a humidity and temperature device.
Sensor sketch that reports light level and displays it in Vera using a light sensor device.
This example sketch counts led-pulses [on i.e. house meters] and converts this into kwh and watt. All is presented in a Power Meeter device in Vera.
This example sketch counts pulses [on i.e. house water meters] and converts this into flow and volume. All is presented in a new Water device in Vera.
Motion sensor sketch that triggers a motion sensor security device in Vera.
Pressure/Temperature/Weather forecast sensor (BMP085)
Example sketch showing how to use a BMP085 pressure sensor to create a simple weather station with forecast calculation. Everything is sent and displayed as a barometer and temperature device in Vera.
Soil moisture sensor that triggers a security sensor device in Vera.
Actuators
An actuator is something that can be controlled [from vera]. It can also be a combination of sensor and actuator like the IR sender/receiver example below.
Relay example sketch that can be controlled from Vera using a regular binary light switch device in Vera.
Relay example sketch that can be controlled from Vera using a regular binary light switch device in Vera. It also shows how you can connect a pushbutton to the Arduino and control the relay like a light switch. The pushbutton change will also update status on vera side.
This is a simple ir sender receiver example. The sketch will receive ir signals and update an vera variable with a unique id. This can be used to trigger scenes or other actions on vera side. The example also shows how to control IR devices by sending out IR commands triggered from a Vera device.
Shows how you can control a servo from Vera. Can be used for controlling blinds or other things in your home.
Other examples
This is an example of a relaying node. It can be used to extend distance between gateway and your sensors far out in the radio network. Messages can travel multiple relay nodes if necessary. Relay nodes can also be used as an ordinary sensor with its own child devices.
Example sketch that fetches local time from vera. Hook up an display and use it to build an Arduino clock or to schedule stuff.
Sketch that can be downloaded to an Arduino to clear EEPROM. The library use it for storing routing information, which relay node that should be used and the unique radio id the node has. Use this to "factory reset" your Arduino if something goes bananas.
Using the Arduino library
It should be pretty simple to use the library (more documentation in vera.h).
An example of basic usage of the sensor library:
#include <SPI.h>
#include <RF24.h>
#include <Sensor.h>
#include <EEPROM.h>

// Create a Sensor library instance
Sensor gw(9,10);

void setup()
{
  // Initialize and start up vera library (this also initializes the radio stuff and node id)
  vera.begin(AUTO);

  // Register sensor(s) to Vera (vera must be in include mode to pick up sensor). The arguments as follows.
  // childId      Each Arduino can have up to 128 child sensors. 0-127.
  //              Here we register childId 0.
  // deviceType   Which (vera) device type to use for this sensor. See Vera.h for all options available.
  //              In this example we use a motion sensor
  gw.sendSensorPresentation(0, S_MOTION);
}

void loop()
{
   // Send a variable change to vera. In this case for childId 0 set the Tripped value to "1".
   gw.sendVariable(0, V_TRIPPED, "1");
   delay(10000); // Delay 10 seconds
}
Power Consumption
My initial power measurements on a Arduino Mini Pro with radio module and motion detector shows a power consumption of 0.48 mA in sleep mode. When motion is detected consumption raises to 1,5 mA for a couple of seconds when radio powers up and transmits data to vera.
Converted to real life figures, this would make three 2000mAh alkaline AA batteries connected in series (giving 4.5V) last for almost 6 months (2000/0.48 hours) directly connected to VCV (not raw as it passes a regulator). Note that this is just a theoretical calculation. I have not made any long time measurements or tests myself yet. Read more about the subject on the following links:
http://hwstartup.wordpress.com/2013/03/11/how-to-run-an-arduino-on-a-9v-battery-for-weeks-or-months/ http://hwstartup.wordpress.com/2013/04/15/how-to-run-an-arduino-clone-on-aa-batteries-for-over-a-year-part-2/ http://www.thalin.se/2013/04/arduino-pro-mini-low-power-modification.html
 When feeding the Arduino Pro Mini with 5V through VCC (unregulated). It is possible to reduce the consumption a few additional uA by cutting of the power regulator which also disables the power led. Note that you cannot feed the arduino through the raw pin after this operation. Note: This tip does not apply to newer pro minis (or funduino in my case) with a different layout.
Buying guide
There are many Arduino models out there. Here is a good overview of the different models:
https://www.sparkfun.com/arduino_guide
A good start kit for building 9 sensors and one Vera gateway could consist of the following components:
Gateway
1x Arduino Nano for the gateway
Sensors
Choose between:
Easy, flexible, expensive
If you don't like to solder or fiddle too much then buy Arduino Nanos for the sensors as well.
Easy, not as flexible, cheapest
Use the 3.3V pro mini. A bit slower (8Mhz). Also be aware that some sensors that you might want to attach might requires 5V, read the specs. If that is the case you might also need a step-up regulator to feed feed it from 3.3V.
1x Serial to USB adapter to download code to Arduino Pro Mini
More complicated, flexible, cheap
If you are up for a challenge and not afraid to solder a bit then buy the following 3 parts instead. The 5V pro mini does not have a 3.3V output so you will have to use a regulator for the radio which requires 3.3V.
10x Arduino Pro Mini for the sensors
1x Serial to USB adapter to download code to Arduino Pro Mini
One of the following power regulators could be used.
Cheap but extremely small and could be hard to solder for a beginner
20x SOT23
Slightly larger (and more expensive) regulators but with real legs that is easier to solder.
5xLE33
Radio module
10x NRF24L01+ wireless data transmission module 2.4Ghz
For longer distances you can use this antenna version
Cables and other good to have stuff
80x Dupont cable Female->Male (buy 2)
160xDupont cable Female->Female (buy 4)
A few pull up resistors 4k7 (used for dallas and humidity sensors)
Some 4.7uF capacitors to stabilize 3.3V power to radio
Prices
Base package price: $8 (Nano+USB) + $32 (Pro Minis) + $9.3 (NRF24) + $4.2 (M->F), $8 (F->F) + $5.3 (Adapter) + $3.5 (Resistors) + $5.6 (Regulators) = $76
Average sensor price for base parts: $76/10 = $7,6
You will find links and prices of the actual sensor hardware (motion pir, temp humidity etc) on the example sketch pages above.
Changelog
CHANGES 1.3 (Beta 2)
Arduino library:
https://github.com/mysensors/Arduino
https://github.com/mysensors/Arduino/archive/master.zip
Vera plugin:
https://github.com/mysensors/Vera
https://github.com/mysensors/Vera/archive/master.zip
- New software ack mechanism. HW acks was very unreliable and generated trash messages.
- Messages is now directed directly to children (fixed previous bug in routing algoritm)
- Sensors now only has one pipe open (self) and gw/repeater nodes two (broadcast, self). Previously it also listened to relay node. This means no more overhearing of messages directed for other nodes.
- Higher radio transmit speed 1->2mbps.
- Energy Pulse meter example added
- Energy Water meter example added
- Fixed bug when sending battery level from sensor
- LAST_UPDATE is set on node-device when any variable update is coming in for children
- Fixed truncation of debug messages
- Updated humidity sensor to fetch unit settings from vera.
- Fixed bug with "SendNodeCommand?" from vera side
- New servo-actuator example.
- Store relay-node in EEPROM.
CHANGES 1.3 (Beta 1)
Download zip:
http://code.mios.com/git_public/mios/arduino-sensor.git/snapshot/HEAD.zip?js=1
Browse tree:
http://code.mios.com/git_public/mios/arduino-sensor.git/tree/HEAD?js=1
- More debug info is printed to serial monitor in sensors (can be turned off).
- Nodes that receive messages from vera don't need to busy wait. New API methods. See new example code in RelayActuator sketch.
- Increased transfer speed (1MBPS) between radios.
- Sent time to sensors uses vera configured timezone
- Radio protocol updated. from/to/version/crc/binary added in message header. This change requires sensors to update their (1.2) library version.
- Variables in vera only gets updated if changed.
- Increased baudrate between vera gateway and vera.
- Message can be sent between sensors without being processed by vera.
- Vera library is now a subclass of RF24 .
- Remove gateway specific code from vera library. New class hierarchy RF24->Node->Relay->Gateway.
- Preserve memory by placing static strings in PROGMEM
- Inclusion mode. Can be started from the Arduino Vera plugin or by using digital input pin on vera gateway (inclusion button). All found devices during inclusion time will be created at once (no multi vera reload/restart cycle needed anymore).
- The ArduinoGateway support blinking leds for RX/TX/ERR and a special blink when inclusion mode is activated.
- Dimmer support
- Lastupdate-variable is set in vera for all changes.
- A new device is created in vera for each physical arduino/radio This device will hold info about node, such as library version, battery info and relay information.
- Support for message relaying. All nodes can act as relay. This functionality can be used for communicating with sensors far away. An relay node forwards messages between sensors and vera gateway. Multiple relays (message hops) is also supported. See RelayActuator sketch for an example how to create an relay node.
- Relay node for a sensor (could be GW) is dynamically located each time a sensor is losing connection. This information is also sent to vera and can be seen in radio node device.
- Unit system can be configured in vera plugin (metric/imperial). Sensors can fetch this setting (isMetricSystem()) and send in data in the correct unit.
CHANGES 1.2
Download: http://forum.micasaverde.com/index.php/topic,16170.msg130599.html#msg130599
- Added possibility to request time from vera
- Support for 5 custom variables (can be stored in any sensor device). Note that chixxis variable container is still not supported. But the functionality is similar.
- Sensors reports their library version to Vera.
- New example sketch showing time and variable functionality
- SendCommand action added in vera plugin which makes it possible to send data to sensors from scenes (advanced-section) or via luup-calls.
- Auto-id added. A sensor can now request id from vera at first start. The id gets stored in the sensors EEPROM. All example sketches now uses auto-id functionality. You can still use static ids if that is preferred.
- Automatically sets LAST_TRIP and BATTERY_DATE
- Fixed "No Implementation" message when pressing Armed/Bypassed on security sensors.
- Cleaned up plugin code
CHANGES 1.0
- Initial release

Attachments
-
nano.jpg
(136.2 KB) -
added by hek 12 years ago.
Arduino Nano
- sdk.png (53.6 KB) - added by hek 12 years ago.
- serial.png (32.2 KB) - added by hek 12 years ago.
- gw.jpg (268.9 KB) - added by hek 12 years ago.
- arch.png (18.4 KB) - added by hek 12 years ago.
- sensors.jpg (113.1 KB) - added by hek 12 years ago.
- Arduino48.png (5.0 KB) - added by hek 12 years ago.
- ProMini-cut.jpg (77.8 KB) - added by hek 12 years ago.
- ArduinoNode48.png (5.7 KB) - added by hek 12 years ago.
- RelayNode48.png (3.6 KB) - added by hek 11 years ago.
- ArduinoVeraArch.png (22.8 KB) - added by hek 11 years ago.
- Node_0.png (5.4 KB) - added by hek 11 years ago.
- Node_100.png (5.7 KB) - added by hek 11 years ago.
- Node.png (5.7 KB) - added by hek 11 years ago.
- Relay_0.png (5.9 KB) - added by hek 11 years ago.
- Relay_100.png (5.2 KB) - added by hek 11 years ago.
- Relay.png (5.2 KB) - added by hek 11 years ago.